hugelbeet

Dad was determined to build one – a hugelbeet – and actually, so was I, but it was Dad that got down to it while I did other things. Urgent things like mow the grass and weeds. Much as I would love acres of meadow (cue romantic visions of wading through fragrant wildflowers and gently waving grasses) I fear the ticks more. And they are gathering as the weather gets warmer. So Dad built the hugelbeet, while I mowed, and Mum raked up the cut stuff. Every so often I’d break off to record his progress. Here he is in action:

Step 1: Clearing a patch of ground.
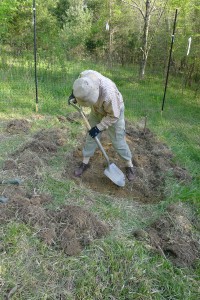
digging out the bed


He’d decided it should be 6×4 feet. What happens first, as with the two beds I’ve dug, is to remove the turf. This gets taken off in pieces and reserved, grass side down, for reuse later. Dad was also interested to see how deep the topsoil layer is in this part of the world. Answer (sadly): not very. A few more inches down and you hit clay. Raised beds, and hugelbeets it is then!


Step 2: Twigs on the bottom.
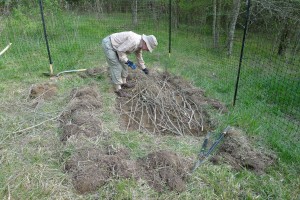
twigs and branches

Twigs and small branches form the bottom layer of the hugelbeet. I have so many fallen branches and tree parts around the homestead site that it was nice to find a use for a few of them. Mum and I, in a little break from mowing/raking, did the twig gathering. Here they all are spread out over the cleared bed.


Step 3: Layer 2 is leaves.
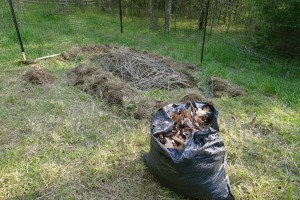
leaf litter!

Leaf litter! Plenty of that lying around as well, although the stuff I collected from the nearest bit of deciduous forest (this bag) was a little on the dry side. We went for pine needle litter next, languishing more moistly under some stands of trees on the eastern edge of the homestead.


Step 4: The Compost layer… such as it is.
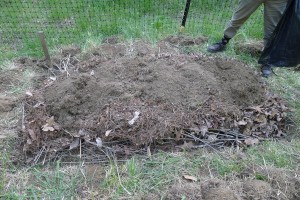
compost layer

There wasn’t much compost ready in my compost bin, so we mostly used what had rotted down from the turf I’d cleared away to make my veggie and flower beds. It wasn’t ideal – not as rich and composty as Dad would have liked – but it was what we had. And damn, we were going to finish this!


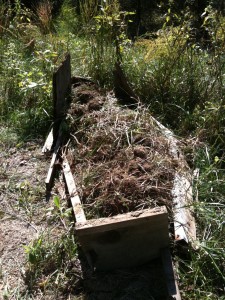
Step 5: Turf Mound
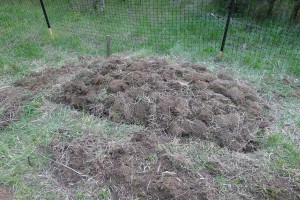
turfy mound

The last thing we did (for the moment anyway) was replace the pieces of turf. It’s not finished yet – needs a layer of topsoil, which I’ll mix with compost and other enriching matter (more MOO-Nure maybe… just tried some of that on my veggie bed). We were a little worried that anyone wandering by (not that anyone should be!) would think this was a makeshift burial, but no! It’s a hugelbeet, almost ready to plant… I’m thinking a bit of three sisters in this one – corn, edamame, squash – if there’s room.
cleaning up, and garden expansion part 1

Two visits’ worth of news to impart tonight. A week ago, after reading some books about gardening in North Carolina (why didn’t I think to get these in the Spring?) I decided I should make a start on clearing more land for a vegetable bed. When my seedlings are ready to go next year, I might actually have somewhere to put them. No more harvesting my first tomatoes in October, delicious though they have been.

I started clearing a strip of land to the left of the wildflower garden, improvising some sides for my growing compost pile with salvaged bits of wood. It’s certainly easier to do this kind of thing in October (rather than June), but frequent tea breaks were necessary all the same. During one of them, I decided that this vegetable bed should be in memory of my grandfathers. If they were still alive, they’d have helped me dig it, I’m sure – or at least supported the cause from a distance! I’ve covered the cleared patch with a weed barrier cloth for now.

beginnings of a vegetable bed
containing the compost


Yesterday I went back up there, maybe to make more progress on the new vegetable bed, but mostly to walk over the homestead site and pick up any last remaining pieces of old metal and dangerous debris, including some coils of barbed wire. Reason for the clean-up? A Hallowe’en party next weekend! There’ll be two children visiting, so I needed to make sure that as much of the homestead site as possible is clear of hazards. Well, forget the veggie bed, although I did measure the width of what I’ve cleared so far, and it’s almost exactly – and completely by accident – 4 feet, which is apparently the optimal width for a raised bed. I also discovered some solid-looking, longish pieces of wood in one of the tumbledown buildings that would make great sides for a raised bed… but that’s for another time. It took me all afternoon yesterday just to do the clearance work.

The worst spot was around the base of one of my trees. Lots of debris, nearly all of it parts of an old electrified fence. The part that wasn’t might have belonged to a bed frame with mattress springs. It’s deeply embedded, and I’ll need to dig it out, but at least it’s easy to see, and doesn’t have sharp edges.

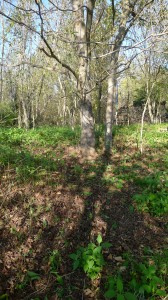
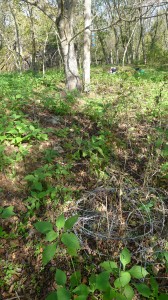
Here are before and after pictures of the clean-up site. Note the barbed wire. It had been there so long that plant and tree roots were holding it in place. I managed to free it all (not without suffering a few scratches – just glad I was wearing safety glasses!) and have relocated it for now to an out-of-the-way spot in one of the tumbledown buildings. Those will be out of bounds for youngsters – and probably best if adults don’t walk over them either. I had another chat with the agent who sold me the land, and he seems fairly sure that there will be a well, possibly nothing more than a deep hole in the ground, somewhere…

after: all clean
before: the dangerous mess

And I’ve refilled the bird feeder too!


Here’s all the debris…

nasty metal bits


… not including the barbed wire coils. The soil looked very rich underneath that circular piece – possibly the top of an old metal drum or container. The pile of sticks is only a fraction of the wood that was littering the area where we’ll camp next week. We’ll have a good fire with it all – let’s hope it doesn’t rain…

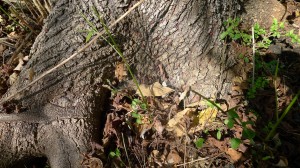
And something else… Lots of red bugs gathering and sunning themselves on a couple of the trees, including the Old Man. They’re boxelder bugs, and this is what they do in October/November, before finding themselves somewhere warmer to spend the winter.

boxelder bugs (click on photo to see them better)

Their presence on the tree with all the debris as well as the Old Man not only help identify those trees as boxelders (the leaves, the bark check out too), but *female* boxelders. Oops. The Old Lady from now on, I guess. The bugs feed on the leaves and seedpods of the trees, but don’t otherwise damage them. I could leave them alone to do their thing, or I could help the trees out (the leaves look very nibbled, I have to say), and try to decrease their numbers a little. Diluted laundry detergent works well, apparently. Thoughts, anyone? Leave the bugs or help the trees?